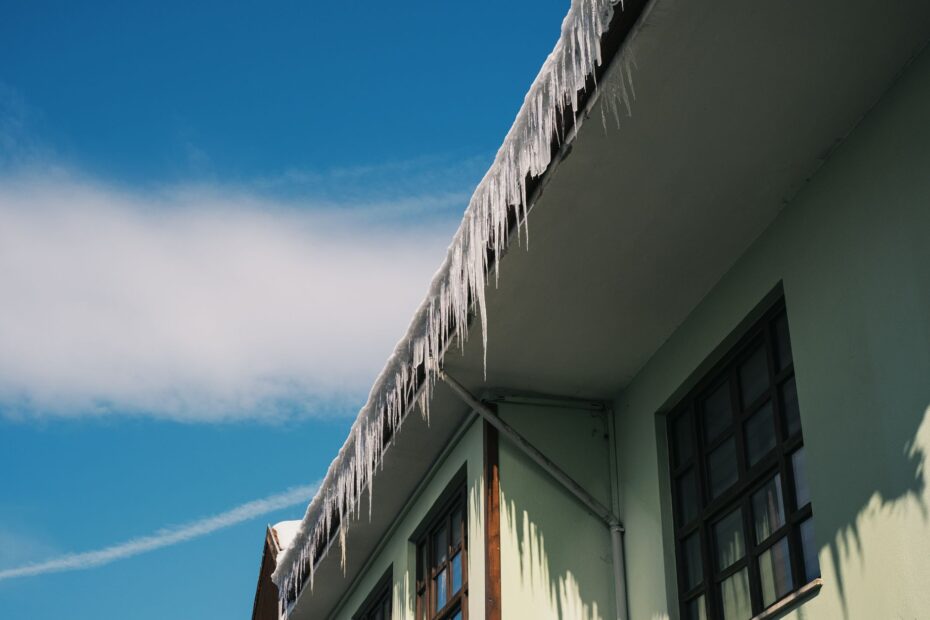
A temperature split across your roof melts snow over a warm upper deck, then refreezes it at cold eaves and blocks runoff. That ice ridge forces later meltwater uphill beneath shingles, where it can reach sheathing, insulation, and ceilings.
You’ll see how attic heat, roof snowpack, weather, and roof shape feed that cycle, then learn safer damage control and durable repairs for your house.
Uneven Roof Temperatures Start the Ice Buildup
An ice dam is a ridge of refrozen ice near the roof edge that blocks meltwater from draining off the roof. The ridge is visible, but standing water above it creates the real threat. Water held against shingles can work beneath their laps and enter your roof assembly.
Icicles alone do not prove an active dam. A frozen gutter can look severe while meltwater still drains over it. Your concern rises where ice spans the roof edge and a shallow pond forms behind it under fresh snow.
Roof eaves stay colder because they extend beyond the heated building envelope. Little indoor heat reaches the underside of that overhang, while the upper roof sits above warmer attic space. That temperature difference gives meltwater a cold surface where it refreezes.
Meltwater Refreezing Turns Snow Into a Roof Leak Risk
Warm roof decking starts runoff beneath snow
Heat escaping through ceilings raises roof deck temperature above parts of the attic. Snow over that warmer section melts from the bottom even while outdoor air remains below freezing. Your roof can appear fully snow-covered while liquid water moves beneath the snowpack.
- Indoor heat escapes: Warm air passes through ceiling gaps and thin insulation into the attic.
- Snow melts below: A warmer roof deck produces runoff beneath the surface snow layer.
- Water moves downhill: Gravity carries runoff toward the unheated roof overhang.
- Eaves refreeze runoff: Cold roof edges turn moving water into a growing ice ridge.
- Water backs up: New meltwater collects behind the ridge and seeks gaps beneath shingles.
Standing water reaches concealed roof materials
Each thaw adds water to the pond behind the ridge. The ice grows taller, and the water level rises with it. Shingles shed rain flowing downhill, but they do not resist water held uphill by a frozen barrier.
| Stage | Roof condition | What reaches your house |
|---|---|---|
| Upper-roof thaw | Snow melts over a warm deck | Liquid runoff moves under snow |
| Eave refreezing | Runoff freezes at the overhang | An ice ridge blocks drainage |
| Water backup | Meltwater ponds above the ridge | Water slips beneath shingle laps |
| Interior leak | Moisture reaches sheathing and insulation | Stains, drips, or wet drywall appear |
Once water passes the roofing layer, it can wet sheathing, attic insulation, ceiling drywall, wall cavities, and light fixtures. Snow supplies the water, while freezing air at the eaves supplies the blockage. Snow also insulates the roof surface, holding warmth below it and extending the melt period.
That retained warmth often originates indoors, where air leaks and insulation gaps warm the roof from below.
Heat Loss Feeds the Warm Roof Areas Behind Ice Dams
Attic air leaks warm narrow roof sections
A small ceiling opening can send a focused plume of warm air into the attic. That heat warms a narrow section of roof deck and melts snow from below. Your recurring bare strip above a bathroom, hallway, or chimney can point to an attic bypass below.
Air leakage is a major source of uneven roof warming because heated indoor air moves upward through gaps around framing and penetrations. University of Minnesota Extension identifies attic air leakage as a major driver of heat loss in cold-climate homes.
- Recessed lights: Older fixtures and wiring openings can leak warm air into attic space.
- Attic hatches: An unsealed hatch acts like a loose lid over heated rooms.
- Plumbing stacks: Gaps around vent pipes send heat upward beside the pipe.
- Chimney chases: Framing cavities beside chimneys can form large concealed air paths.
- Bath-fan ducts: Loose or uninsulated ducts release warm, moist exhaust near the roof.
- Dropped soffits: Boxed ceiling areas can open into attic cavities above walls.
Insulation and ventilation handle different parts of the problem
Attic air sealing stops warm air movement, while attic insulation slows heat flow after gaps are sealed. Thin, compressed, wet, or displaced insulation leaves warm patches on the roof deck. Thermal bridging through framing can add smaller warm lines where joists or rafters carry heat upward.
Soffit vents and ridge vents move cold outdoor air beneath roof sheathing, yet ventilation cannot overcome major ceiling leaks. Your insulation work should keep soffit intake openings clear of loose-fill material. A clear intake path and ridge exhaust help keep roof temperatures more even after larger heat-loss paths are sealed.
Attic ventilation moderates roof temperature, but ceiling air sealing and adequate insulation stop the heat that feeds meltwater.
Snow, Weather, and Roof Shape Focus Water in Predictable Areas
Repeated thaws enlarge an existing ice ridge
Several snowfalls mixed with daytime temperatures near freezing give the cycle fresh fuel. Sun can warm a roof surface during the day, then nighttime cold freezes runoff again. Your risk rises through a week of snow, mild afternoons, and cold nights because each cycle adds ice to the same edge.
Snow load, ice, and shifting temperatures affect houses in different ways. For ice dams, the pattern is direct: snowmelt forms above, then meets below-freezing roof edges lower down. That pattern aligns with winter-weather information from the National Weather Service.
Roof intersections collect runoff at weak points
| Roof feature | Why water concentrates there | What you should inspect |
|---|---|---|
| Valleys | Two roof planes funnel runoff together | Ice lines and shingle lift near the valley bottom |
| Dormers | Wall intersections interrupt snow movement | Flashing, sidewalls, and roof-edge buildup |
| Skylights | Framing changes insulation and heat flow | Snow melt above uphill flashing |
| Low-slope transitions | Water moves more slowly across flatter sections | Ponding ice near the slope change |
Cathedral ceilings and finished attics bring a tougher constraint because little room exists for deep insulation or a continuous ventilation channel. Your recurring trouble at one dormer or behind one chimney may reflect roof geometry as much as gutter drainage. Clean gutters move water after it reaches them, but they do not fix a warm upper roof and cold eave pattern.
Visible and Indoor Signs Show Whether Water Is Backing Up
Exterior ice reveals where runoff is stopping
Thick ice at the eaves, expanding icicles, raised shingles, and repeated buildup after each snowfall deserve attention. Large icicles can pull on gutters, yet their main value is their location. Your attic inspection should focus below the section where ice returns.
A bare roof strip above deep snow is another useful clue. It points to a warmer roof deck in that area, especially where nearby roof sections remain snow-covered. That contrast can trace heat loss to a bath fan, attic hatch, chimney chase, or missing insulation.
Interior moisture raises the urgency
Water stains, drips, peeling paint, damp insulation, musty odors, and sagging drywall point to water backing up beneath shingles. A ceiling stain can appear several feet from the roof entry point because water follows framing before reaching your ceiling.
Move quickly where water nears electrical fixtures, drywall bows downward, or ice growth speeds up over a day. Shut off power to a wet fixture only from a dry location and contact a qualified professional.
Icicles without stains or roof-edge ice may be a nuisance rather than an active leak. But recurring icicles beside a thick eave ridge call for closer attention. Your house can lose heat long before water reaches living areas.
Short-Term Steps Limit Water Damage Without Harming the Roof
Indoor protection comes before roof work
Catch drips in containers, move furniture and electronics, and photograph stains, ice, and wet materials. Your photos should show dates and affected rooms. That record helps a contractor trace the water path and supports an insurance notice.
Ceiling sag changes the situation. Keep clear of the area, protect nearby belongings, and contact a roofing or restoration professional. Wet drywall can release suddenly under the weight of trapped water.
Ground-based snow removal limits new runoff
- Use a roof rake: Pull snow from the lower few feet while standing safely on the ground.
- Leave roof clearance: Keep the rake blade off shingles to avoid scraping granules and flashing.
- Stay off ladders: Ice, snow, and awkward rake movement make improvised access hazardous.
- Use steam removal: Contact a steam-removal professional for active leaks, steep roofs, or heavy buildup.
- Avoid chopping ice: Hammers, axes, chisels, and pressure washers can fracture shingles and gutters.
An ice dam steamer uses low-pressure steam to cut channels through ice without the impact of mechanical chopping. Calcium chloride products are sometimes placed in fabric tubes for limited melting, but loose pellets and corrosive salt mixtures can harm plants, finishes, gutters, and roofing materials. Your safest choice during a substantial leak is professional steam work rather than roof access.
Emergency removal clears the immediate blockage, whereas lasting prevention depends on limiting heat at the roof deck.
Long-Term Control Begins at the Ceiling Plane
Repair work follows a clear sequence
Close attic bypasses before adding insulation. New insulation over open gaps hides the heat path without stopping it. Your contractor should seal penetrations, restore insulation coverage to a suitable local depth, then check soffit-to-ridge airflow where the roof design permits it.
- Seal ceiling gaps: Close openings around pipes, wires, hatches, chases, and recessed fixtures.
- Restore insulation depth: Correct thin, settled, wet, or displaced attic insulation after air sealing.
- Clear soffit paths: Install baffles where insulation crowds intake vents at the roof eaves.
- Check exhaust ducts: Route bath fans outdoors and insulate ducts passing through a cold attic.
- Inspect roof details: Review flashing and underlayment where dams return at valleys or dormers.
How to prevent ice dams starts with keeping indoor heat below the attic floor rather than warming the roof deck. A continuous ceiling air barrier, full insulation coverage, and open ventilation paths reduce the snowmelt that reaches cold eaves. Your repairs should match the heat pattern visible on the roof.
Different specialists address different evidence
A home-energy assessor can locate heat loss with infrared imaging or blower-door work. An insulation contractor can correct attic bypasses and coverage gaps. Your roofer can inspect shingle condition, flashing, and ice and water shield placement, but roof work alone does not stop a ceiling-plane heat leak.
Roofers are responsible for defective installation within their scope, such as failed flashing or poorly installed underlayment. Ice dam causes can extend through insulation, attic air sealing, duct routing, and ventilation. Your repair plan should follow the evidence rather than assigning every dam to shingles.
Ice dam insurance coverage depends on policy language, the water source, and listed exclusions. Homeowners insurance can cover sudden resulting water damage in some situations, while maintenance-related conditions may fall outside coverage. Photograph damage, retain invoices, and notify your insurer promptly while the source and extent remain visible.
Bottom Line
The ice ridge is the visible symptom, while uneven roof temperature drives the cycle behind it. Your strongest long-term response is stopping indoor heat from reaching the roof deck through ceiling gaps and weak insulation, then keeping attic ventilation paths open where the roof allows.
That sequence reduces meltwater feeding cold roof eaves. It also answers what causes ice dams on roofs: warm upper roof sections send runoff toward colder edges, where meltwater refreezing blocks drainage and pushes water beneath shingles.
FAQ
How do I stop ice dams on my roof?
Stop the heat pattern feeding the dam by sealing attic air leaks, restoring attic insulation, and keeping soffit vents and ridge vents clear where the roof design allows. Your short-term option is pulling lower-roof snow from the ground with a roof rake or hiring a steam-removal professional.
When should I worry about an ice dam on my roof?
Act promptly where you see water stains, drips, damp insulation, sagging drywall, rapid ice growth, or moisture near electrical fixtures. Your concern should also rise where the same eave develops thick ice after each snowstorm, since repeated buildup points to a continuing heat-loss path.
Does homeowners insurance cover roof damage from ice dams?
Sudden water damage from an ice dam may be covered, though coverage depends on policy wording, the water source, and maintenance exclusions. Photograph the ice and interior damage, keep contractor invoices, and notify your insurer soon after you find the loss.
Are roofers responsible for ice damming?
A roofer can be responsible for defective roofing work, such as failed flashing or poorly installed underlayment. Yet ice damming also stems from attic air leakage, inadequate insulation, blocked ventilation, and roof geometry, so your house may need an energy or insulation specialist as well.
Can I remove an ice dam myself?
You can reduce new meltwater by pulling snow from the lower roof with a ground-based roof rake. Avoid climbing onto an icy roof or striking ice with tools because falls and shingle damage are common outcomes. Your safest response to a large dam or active leak is professional steam removal.
Why do ice dams form at the eaves instead of higher up on the roof?
Roof eaves extend beyond heated living space, so their underside stays colder than the upper roof deck. Meltwater from warmer roof sections reaches that cold overhang and freezes there. Your upper roof may stay warm enough for melting while the edge stays cold enough for a solid ice ridge.